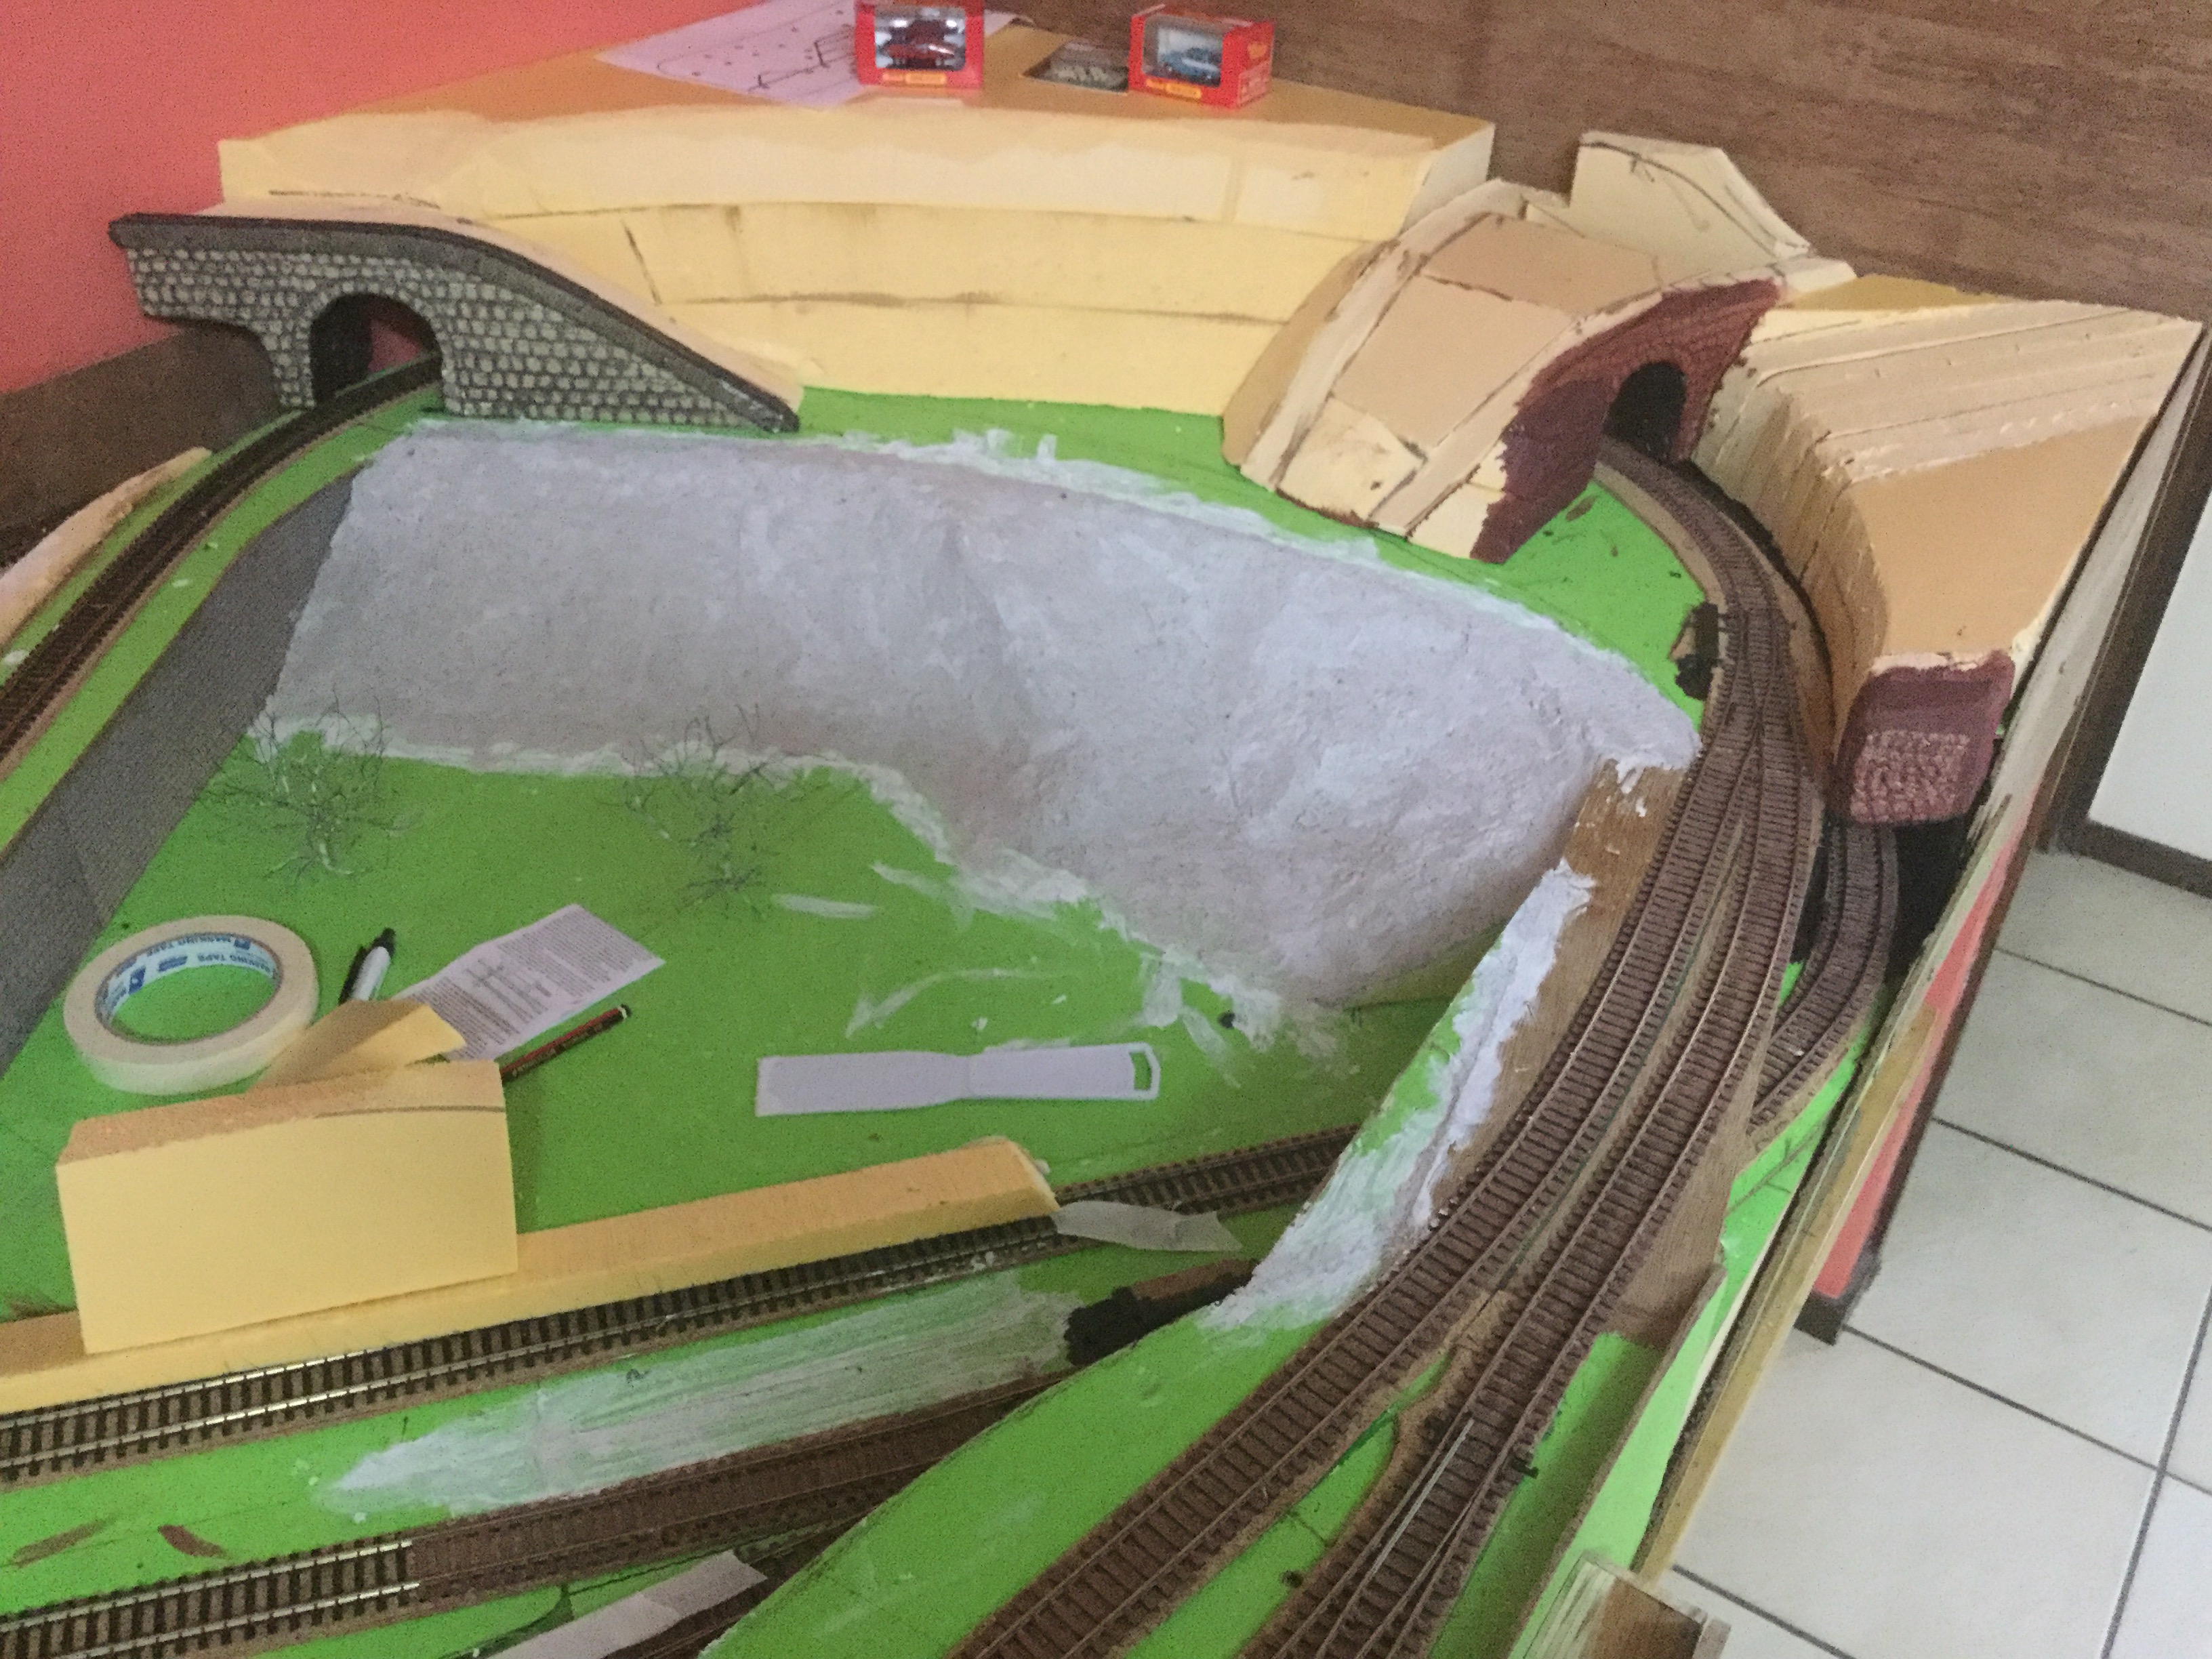
Well this was a challenge, to work out exactly how to fill in the gaps between levels especially when they at 2 different angles. I thought long and hard how to achieve this, in the end I used my table saw to cut expanded foam to the taper between the levels, which ended up about 10mm thick. This made it thin enough to bend around the corners and then I scribed the second gradient angle, which was very easy to trim to shape. I carefully used construction glue to hold these in place. When that was dry I used a product called “Sculpt-It Modelling Mix” (from Office works) to fill the foam pores, edges and shape to the desired profile. Turned out far better Thani anticipated.